How to Build a Digital Clock
Now we will start working on our first "app" of the smartphone project, a digital clock.
Dates and times in JavaScript are fairly easy to figure out but there are a few tricks you need to employ to turn them into a standard clock that we use on a regular basis.
In the JavaScript for this project, we will convert the time from a 24 hour clock to a 12 hour clock and add 0's to any numbers that are less than 10. It's a nice basic project that should be a great start for anyone newer to JavaScript.
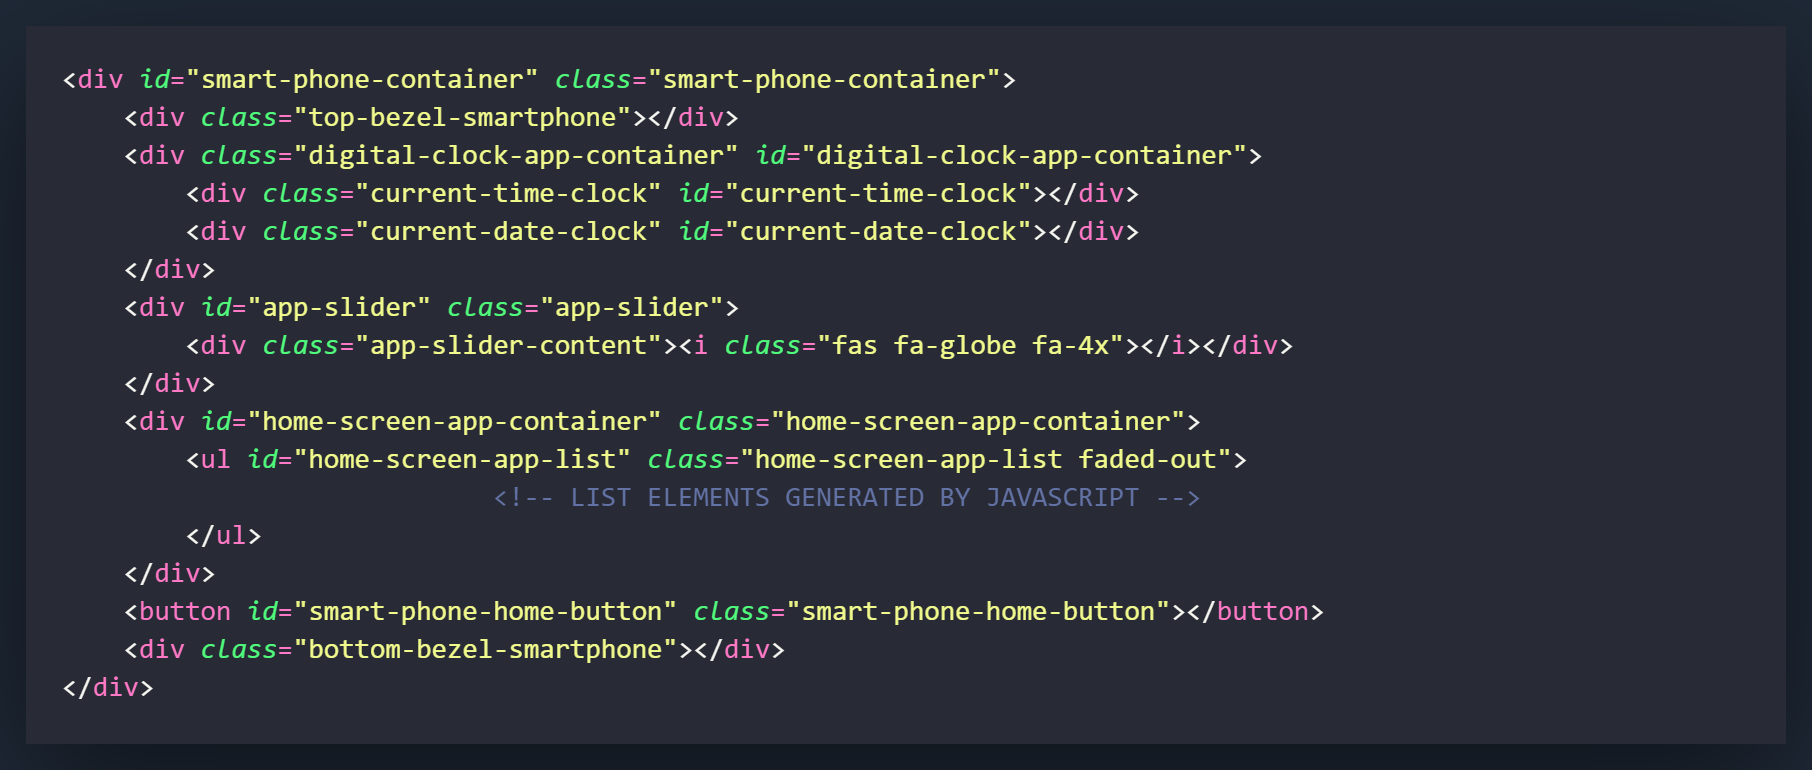
There is not many things that we need to add to the HTML for this project. It is basically a parent div with 2 divs nested inside of it.
The first thing we will do is create the digital-clock-app-container div. This will serve as the container for the content of the app.
Next we will add 2 divs inside of the digital-clock-app-container. The first will be the current-time-clock which will house the time. The second will be the current-date-clock which will house the current date.
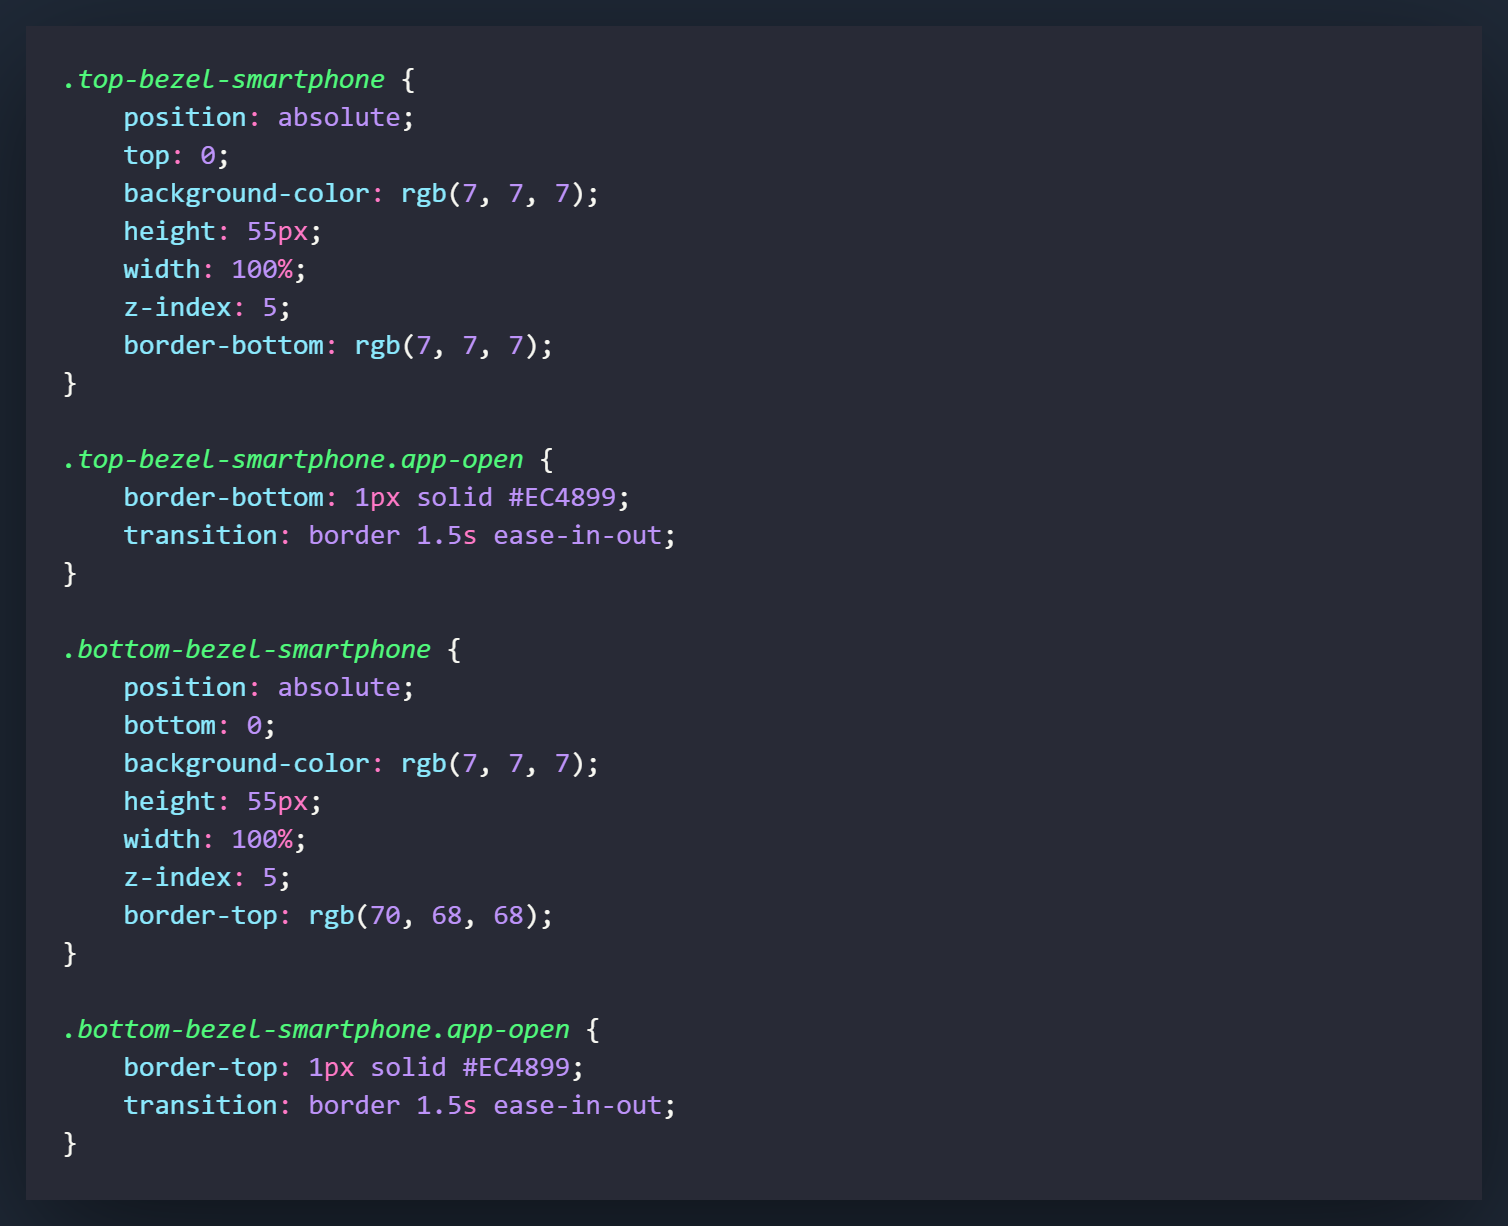
The next 2 class settings we will create are purely for cosmetics. They will create a pink bar on the bottom of the top bezel and at the top of the bottom bezel, anytime an app is opened.
Revisit the class settings we created for top-bezel-smartphone and .bottom-bezel-smartphone and make a separate class setting with the .app-open class attached. The 2 settings for these classes basically set the border and a transition so they fade in when they are added.
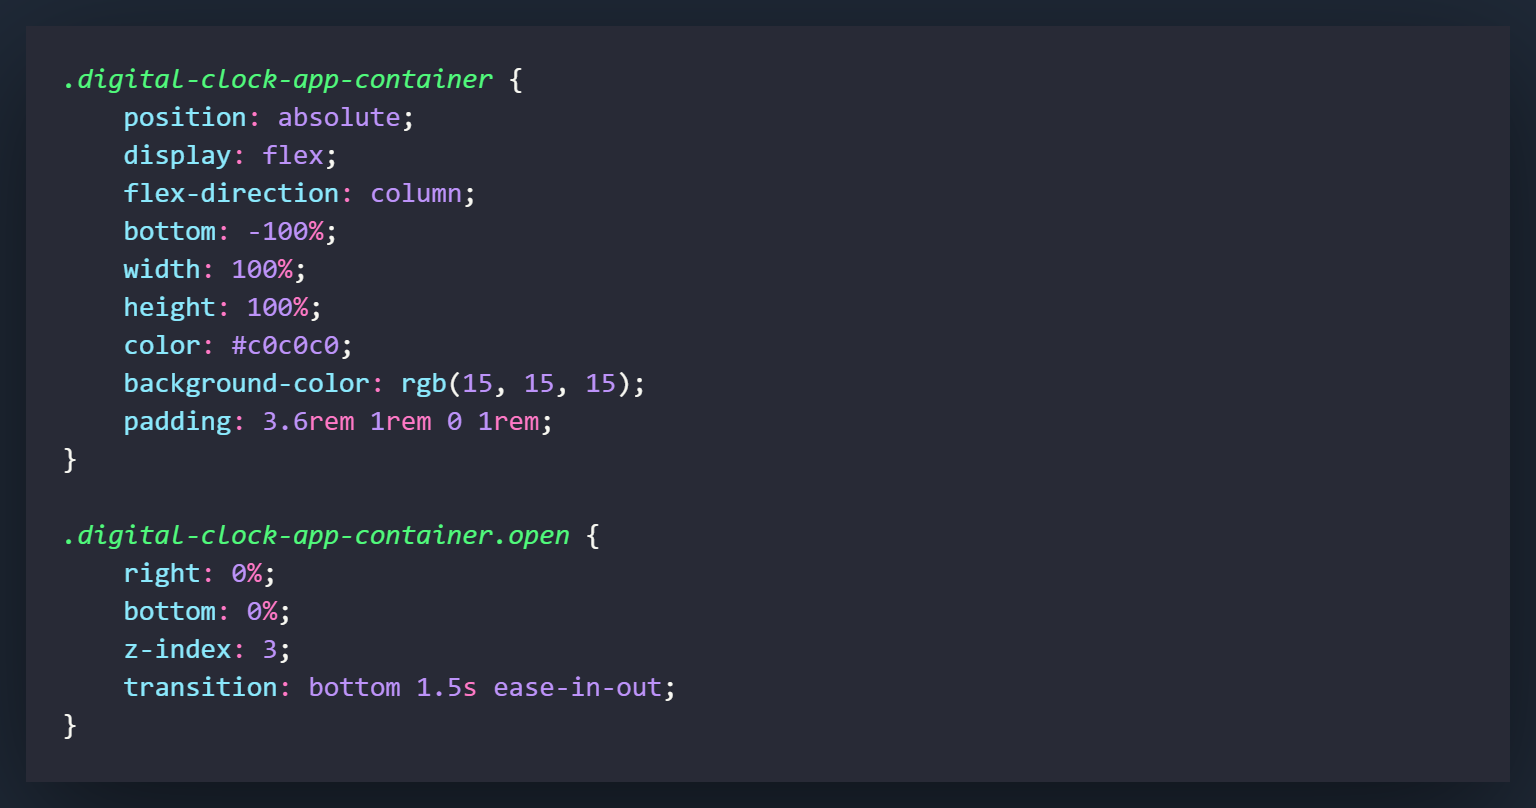
The .digital-clock-app-container class will be what we use to style the container for the app. The position of absolute is so we can change the initial starting point of the div. Most of the other attributes are used for styling and alignment of the elements inside of the div, with the exception of the bottom setting.
At it's default resting state, we want this div to sit underneath the screen so it can slide in. We will achieve this by setting the bottom attribute to -100%. When the .open class is added it will cause the div to slide up to a bottom setting of 0%
The settings when the .open class is added are actually the most important to make this div function properly. When .open is added to .digital-clock-app-container, the div is going to slide up to sit at 0%. When it is added we also want the z-index to change to 3 so it will sit above everything on the home screen. The other setting that will be changed later on in the project is the right attribute. This is going to set right to 0% for the time being, later on when we remove the app, we will set it to -100% causing it to slide off screen.
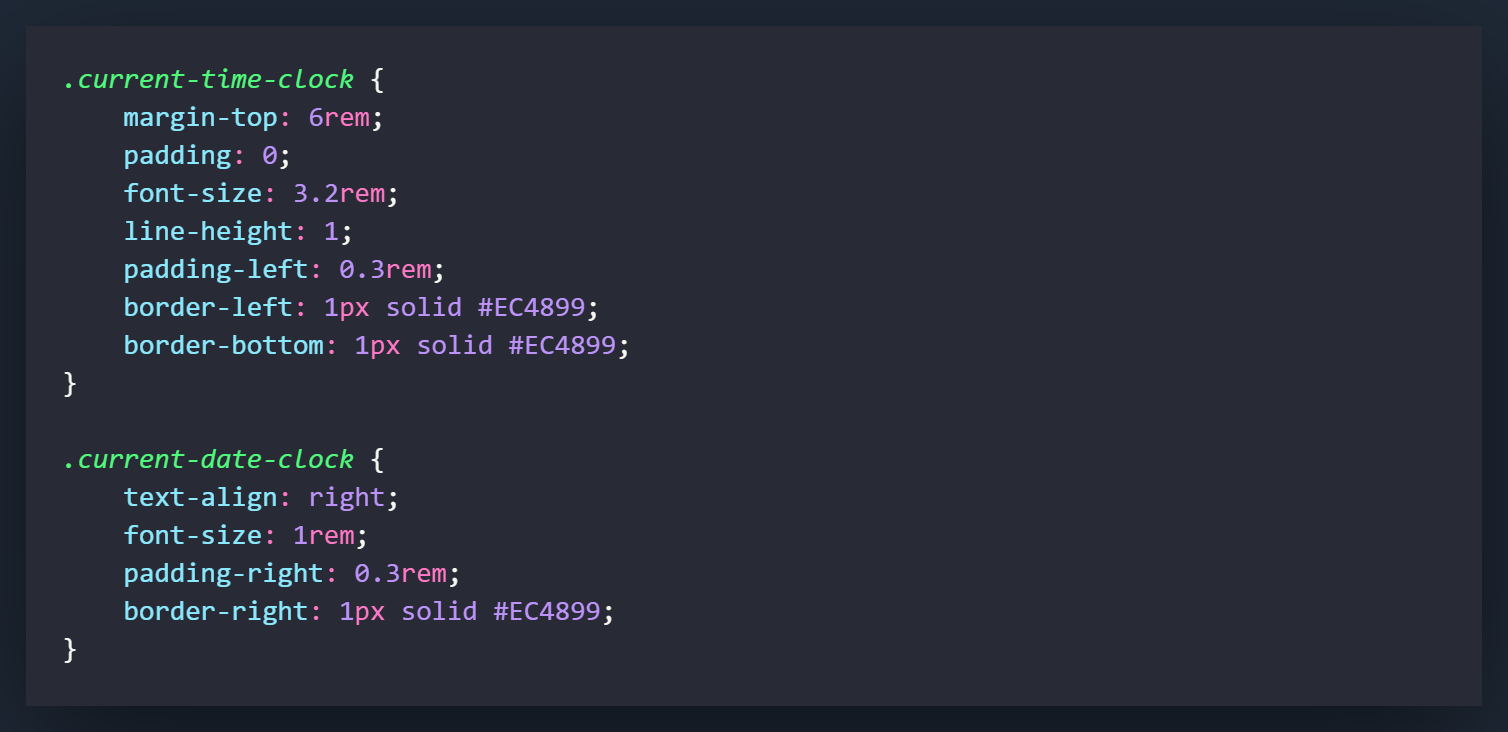
The next settings are how the time and date settings are going to look in the app. These can actually be changed to however you would like them to appear.
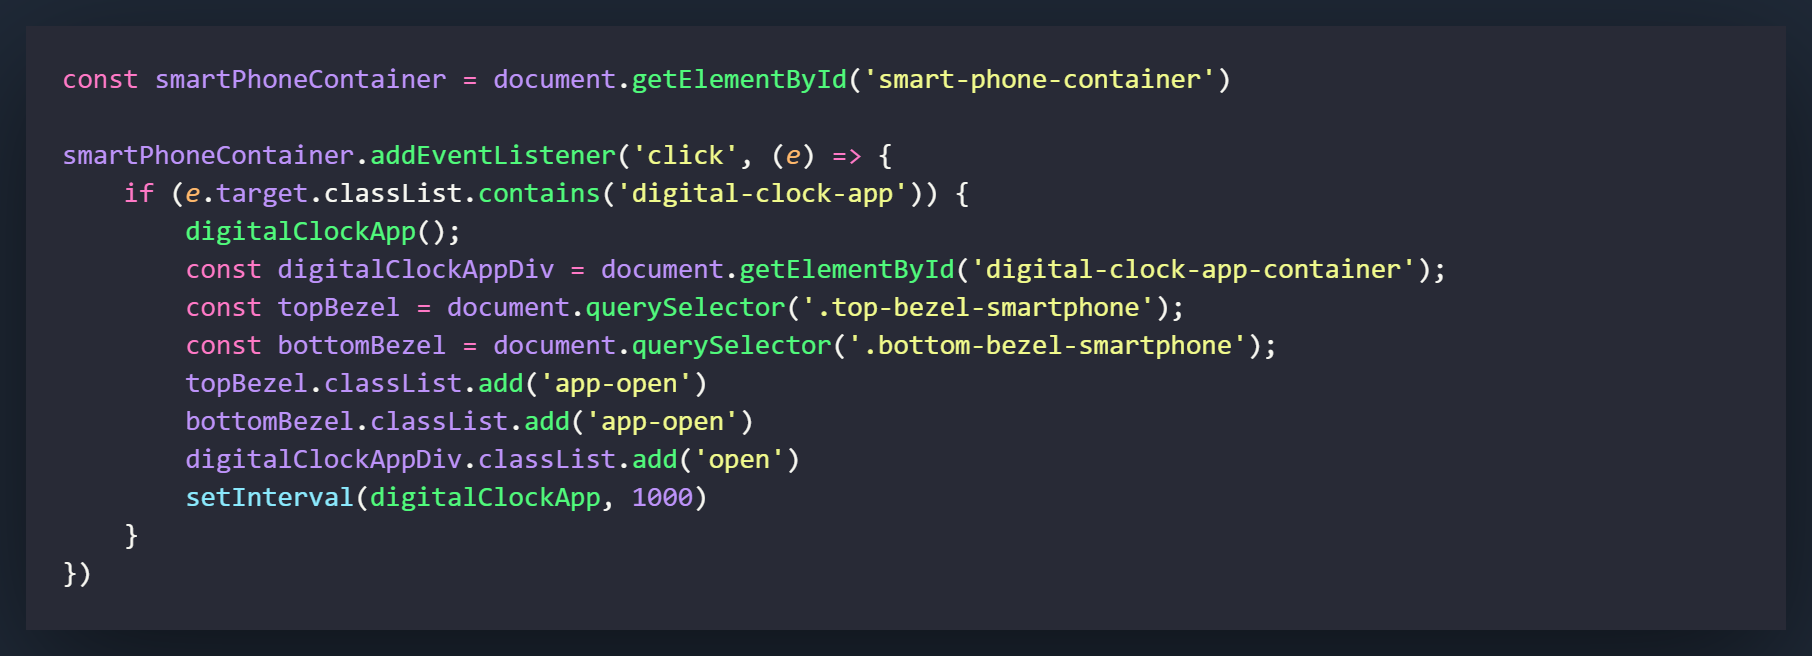
The first thing we will do is create a variable called smartPhoneContainer by using getElementById on the smart-phone-container ID.
Now we will create a click eventListener on the smartPhoneContainer. Generally you would link an eventListener to a direct element but in JavaScript things tend to be pretty fluid. Elements will need to be clicked that didn't exist when the page was loaded and will generally be inaccessible unless you use a parent element to find it. That's what we will do with the smartPhoneContainer. The important thing you need to do here is to pass in an event instead of an anonymous function. This is shown as the (e) in the brackets after the 'click' listener.
If you have never used an event on a click eventListener, add console.log(e.target) and open the console to see everything that you are clicking on. I have found this to be one of the handiest tools I have at my disposal as I have been learning JavaScript. It has saved me a ton of time, revealing exactly what I was clicking on at any given time.
Moving on, we will start the function with an IF statement that will take the event and look for something that matches what we are looking for. In this case we are looking for an element that has the class of digital-clock-app. The only thing within the smartPhoneContainer that will have this class will be our icon for the digital clock which has the class appended to it when it is created from the array (This was something we did back in the "Build a Home Screen" section). When you click on the icon, it will run the rest of the code from the IF statement.
The first thing this will do is call the digitalClockApp( ) function. We have not created this function yet, so what you may want to do is comment it out until we have created it so you don't throw up any errors which could prevent the rest of the code from running.
Now we will create 3 variables for the digitalClockAppDiv, the topBezel and the bottomBezel. We will be adding classes to these in the next steps.
The next 2 steps will add the class of .app-open to the topBezel and bottomBezel variables. This will create the pink bars on the bezels when an app is opened.
The next step will add the class of open to the digitalClockAppDiv div. This will cause the div to slide up from a bottom setting of -100% to 0%, making it visible.
Now we will run a setInterval on the digitalClockApp( ) function. The 1000 represents 1000 milliseconds which means that the function will be ran once every second. This is what is going to make the seconds on our digital clock update every single second.
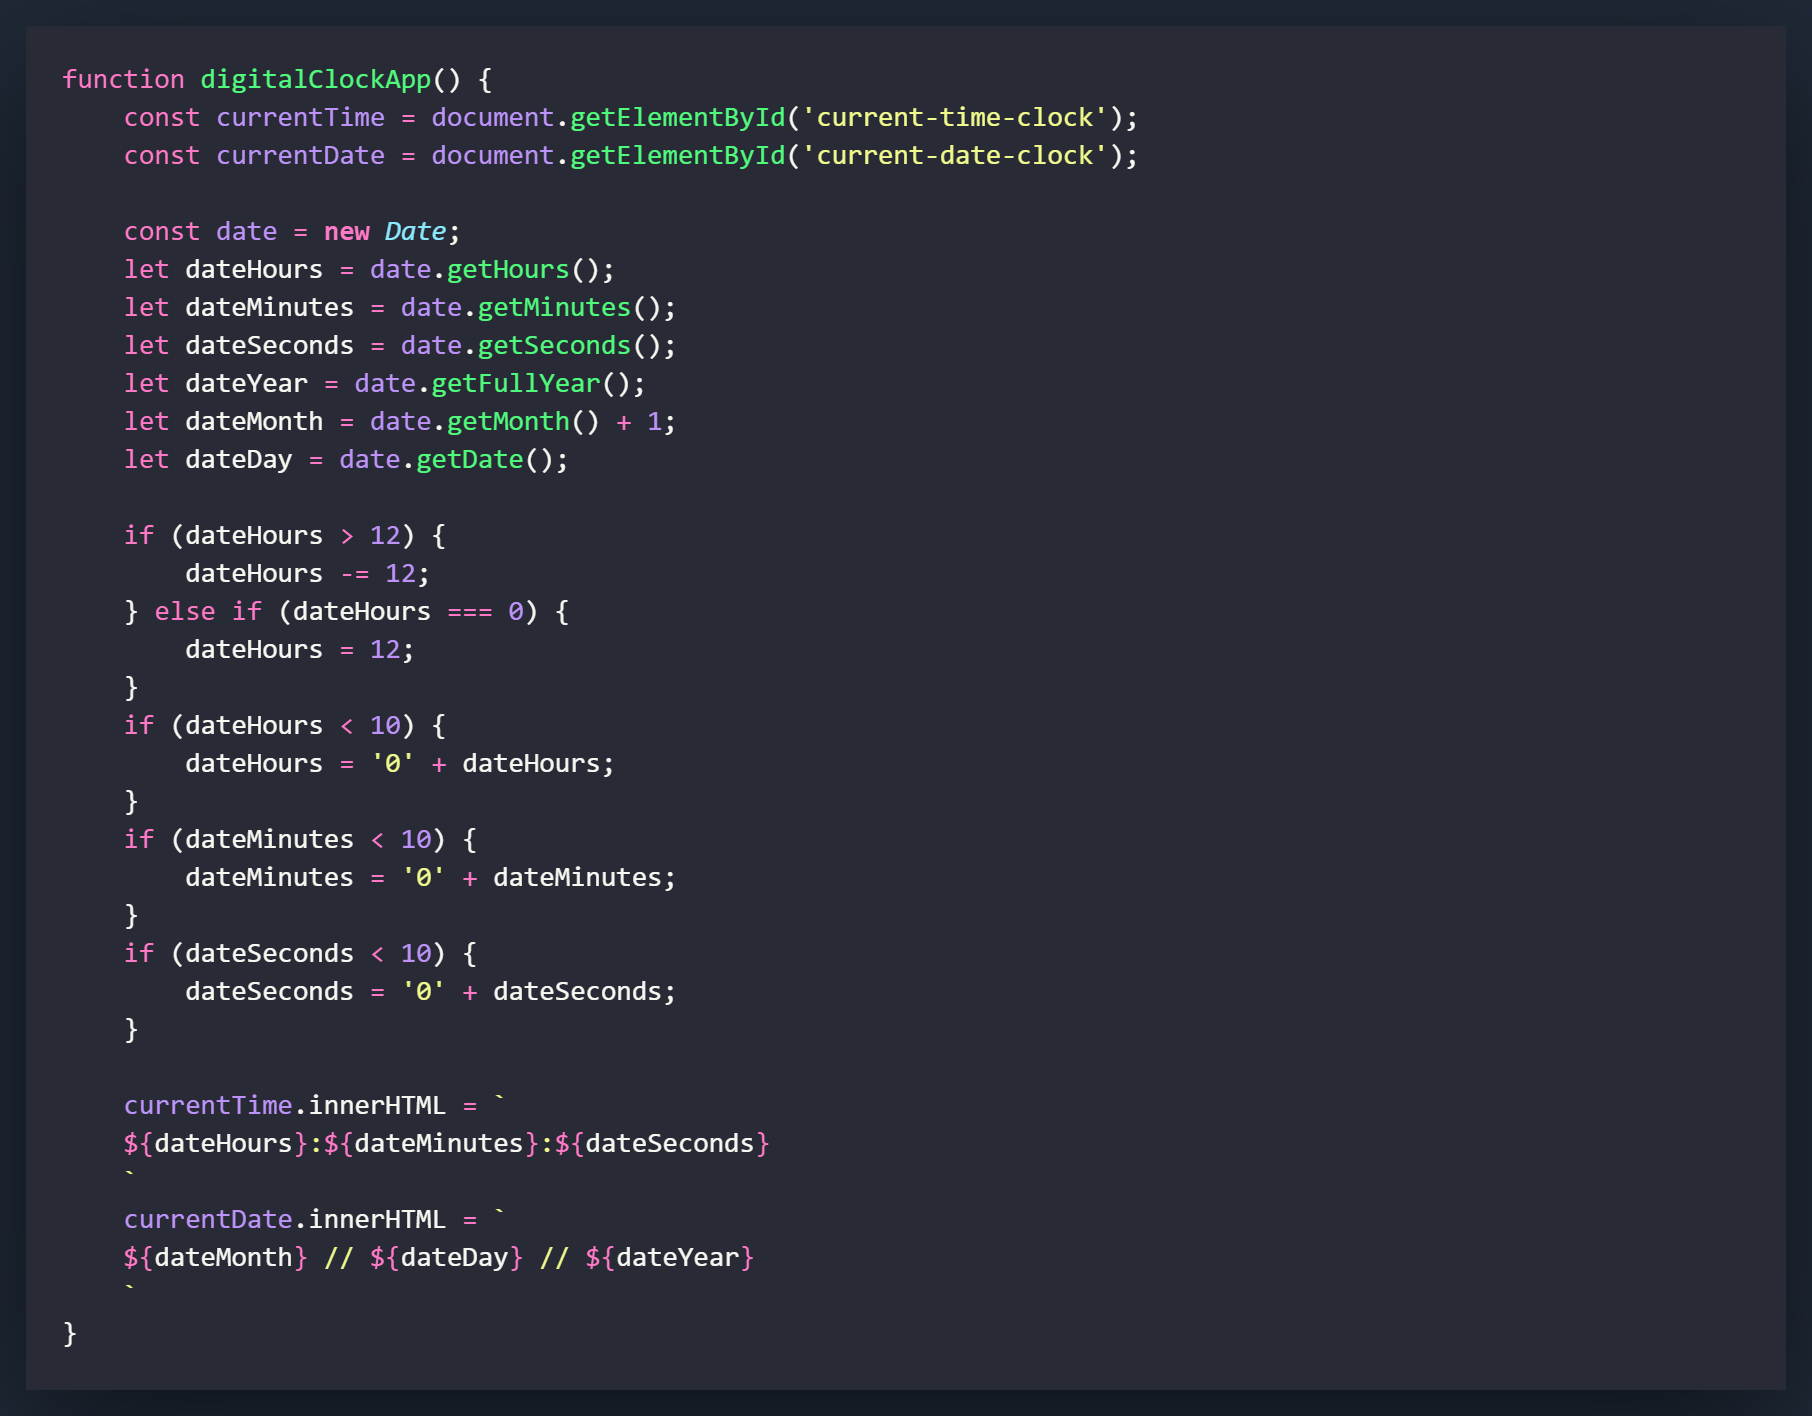
Now we will move onto creating the function that will run when we call digitalClockApp( ).
First create the digitalClockApp function.
Now create 2 variables, one for currenTime and one for currentDate. These will be the locations where we fill in the date by changing their innerHTML.
Now the most important part of the digital clock, we are going to create a variable that will connect to JavaScript's built-in Date function. This will allow us to pull certain attributes out and apply them to our project.
Declare 6 variables that will allow you to get the hours, minutes, seconds, year, month and day. Ensure you declare these with let because they will need the ability to change and update as the function runs.
Of the variables that you declared, add a +1 to the month variable because it is zero-indexed. Meaning that January is 0, February is 1, etc.
The first IF statement is going to be what converts our 24 hour clock to a standard 12 hour clock. The first part of the IF statement states, that for any number over 12, we will deduct 12. So 13, would be 1, 14 would be 2, and so on. The ELSE IF part of the statement declares that if hours equals 0, we will convert it to 12. This would apply at the time between midnight and 1 AM.
The second IF statement is going to add a zero to any number that is less than 10. For the hours variable it is purely aesthetic but for minutes and seconds it is needed. Without it, you would have your clock showing times like 12:5:5 when it is actually 12:05:05. Use concatenation to achieve this in a nice painless way.
Now we will be able to write what we have come up with to the DOM by using template literals. Start with currentTime.innerHTML and use the variables of dateHours, dateMinutes, and dateSeconds.
After that, do the same to currentDate.innerHTML with the dateMonths, dateDay, and dateYear variable.Now if you refresh the page and push the icon button, you should see the digital clock app slide up from the bottom.
In the next section we will work on closing the application and repopulating our home screen by pushing the home button.